Key Takeaways
-
Clean filter cartridges monthly during swimming season, using specialized cleaning solution to remove oils and minerals that regular rinsing can’t eliminate.
-
Monitor pressure gauge weekly – readings 8-10 psi above normal indicate your filter needs cleaning or maintenance.
-
Replace filter sand every 5-7 years when backwashing becomes frequent and water clarity doesn’t improve, using #20 silica sand.
-
For DE filters, backwash every 1-3 months and add fresh DE powder to maintain optimal filtration and grid performance.
-
Inspect filter components regularly for wear, including O-rings, housing cracks, and grid damage to prevent costly future repairs.
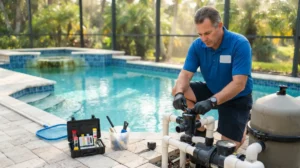
Your pool filter works hard every single day, quietly keeping your water crystal clear and safe for swimming. But when it starts acting up, you might feel a bit lost about what to do next. The good news? Most filter repairs are simpler than you think, and catching problems early can save you hundreds of dollars down the road. Whether you’re dealing with cloudy water, strange noises, or pressure gauge warnings, understanding basic filter repairs helps you make smart decisions about your pool’s health. This guide walks you through the most common filter fixes that Tampa pool owners face, so you can keep your backyard oasis running smoothly all year long.
Understanding Your Pool Filter Type
Before diving into repairs, you need to know which type of filter you have. The three main types are cartridge, sand, and diatomaceous earth (DE) filters, and each one requires different maintenance approaches. Cartridge filters use pleated fabric to trap debris and are popular for smaller residential pools. Sand filters push water through a tank of specially graded sand that catches particles. DE filters use a fine powder made from fossilized organisms to provide the most thorough filtration. Knowing your filter type helps you troubleshoot problems faster and order the right replacement parts when needed.
Each filter type has its own personality and maintenance schedule. Cartridge filters are the easiest to maintain but need replacement cartridges every few years. Sand filters are workhorses that can last years with minimal attention but eventually need fresh sand. DE filters offer superior water clarity but require more hands-on care with regular powder additions. If you’re not sure which type you have, check the manufacturer’s label on the filter tank or take a quick photo and reach out to professional pool technicians who can identify it for you.
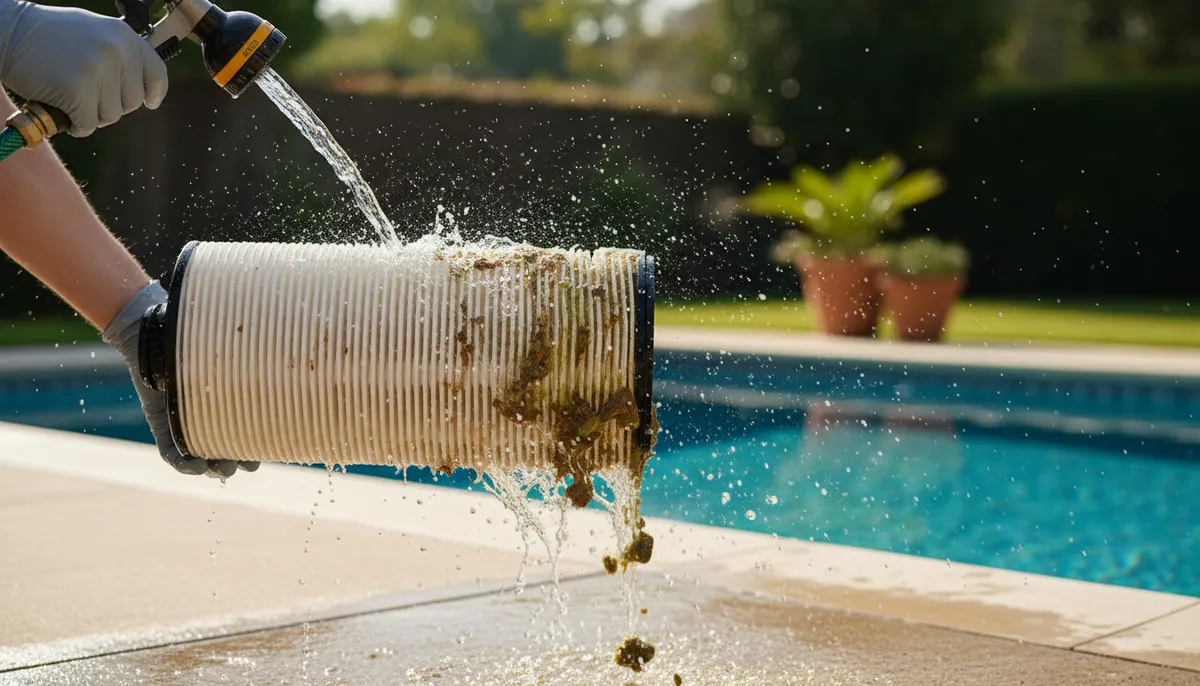
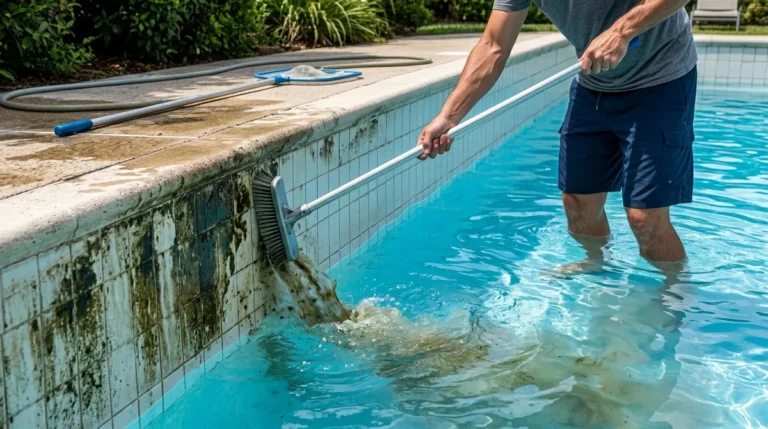
1. Cleaning Clogged Filter Cartridges
Dirty cartridge filters are the most common repair issue Tampa pool owners face. When your cartridge gets clogged with leaves, sunscreen residue, and other debris, water flow slows down and your pump has to work overtime. The fix is refreshingly simple: remove the cartridge and give it a thorough rinse. Turn off your pump completely before opening the filter housing, and carefully lift out the cartridge element. Use a garden hose with a spray nozzle to rinse between every pleat, working from top to bottom until the water runs clear.
For stubborn buildup, you’ll need a deeper clean. Soak your cartridge overnight in a specialized filter cleaning solution or a mixture of water and filter cleaner. This dissolves oils, minerals, and other gunk that regular rinsing can’t touch. After soaking, rinse thoroughly again and let the cartridge dry completely before reinstalling. Most cartridges need this deep cleaning monthly during swimming season and should be replaced entirely every two to three years when the fabric starts breaking down or the pleats lose their shape.
Signs Your Cartridge Needs Attention
Your filter cartridge will tell you when it needs help if you know what to look for. Here are the warning signs:
- Pressure gauge reading 8-10 psi higher than normal operating pressure
- Cloudy pool water that won’t clear up after chemicals are balanced
- Reduced water flow from return jets
- Visible tears, holes, or crushed pleats on the cartridge fabric
- Brown or black staining that won’t rinse away
- Cartridge is older than three years
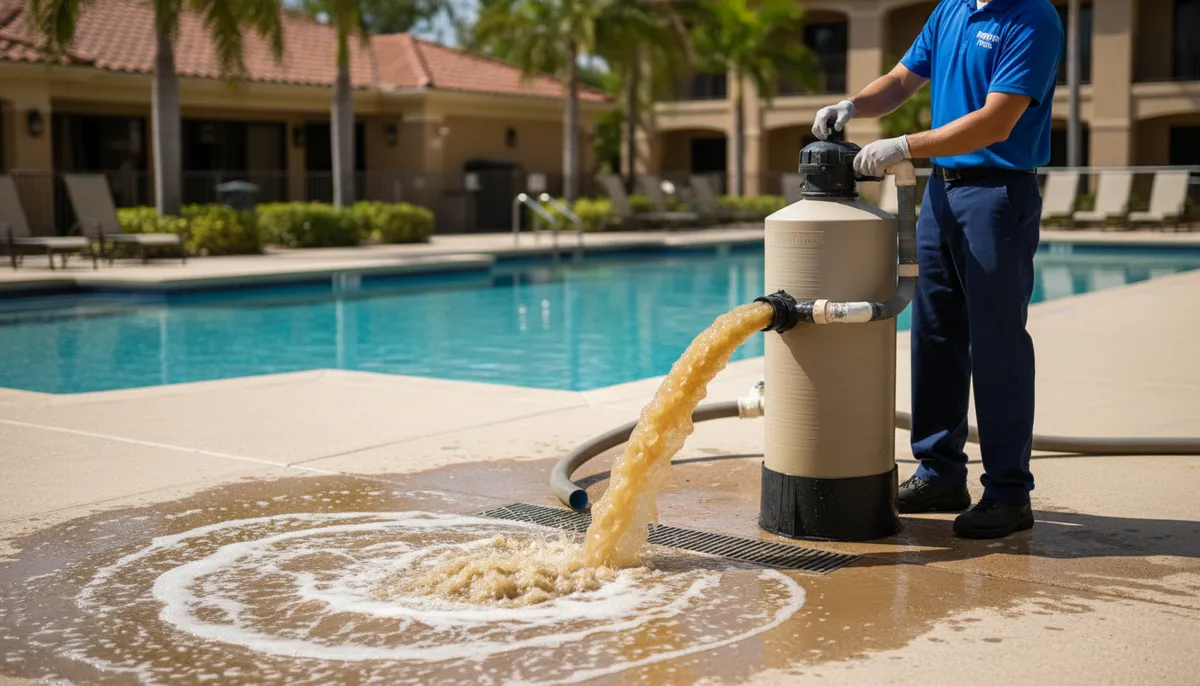
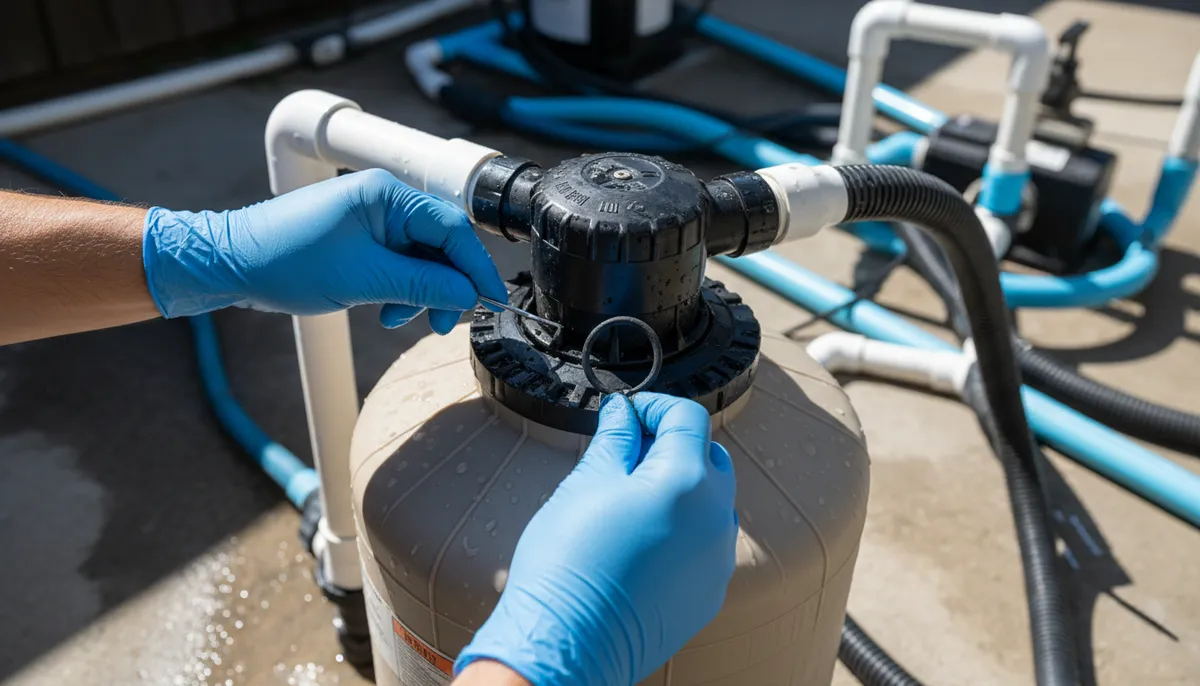
2. Backwashing Sand Filters Properly
Sand filters need regular backwashing to flush out trapped debris and maintain proper water flow. This repair isn’t really a fix for something broken but rather essential maintenance that prevents bigger problems. When dirt accumulates in the sand bed, water pressure builds up and filtration efficiency drops. Backwashing reverses the water flow through the filter, lifting out the debris and sending it to waste. Most sand filters need backwashing every one to four weeks depending on pool usage and environmental factors like nearby trees or frequent storms.
The backwashing process takes about five minutes once you get the hang of it. Turn off your pump, move the multiport valve handle to the “Backwash” position, then turn the pump back on. Watch the sight glass on the waste line until the water runs clear instead of cloudy or dirty. Switch the valve to “Rinse” for about 30 seconds to settle the sand bed, then return to “Filter” mode. Always turn off the pump before moving the valve handle to avoid damaging the internal spider gasket. If you’re backwashing more than once a week, your sand might be ready for replacement, which typically happens every five to seven years.
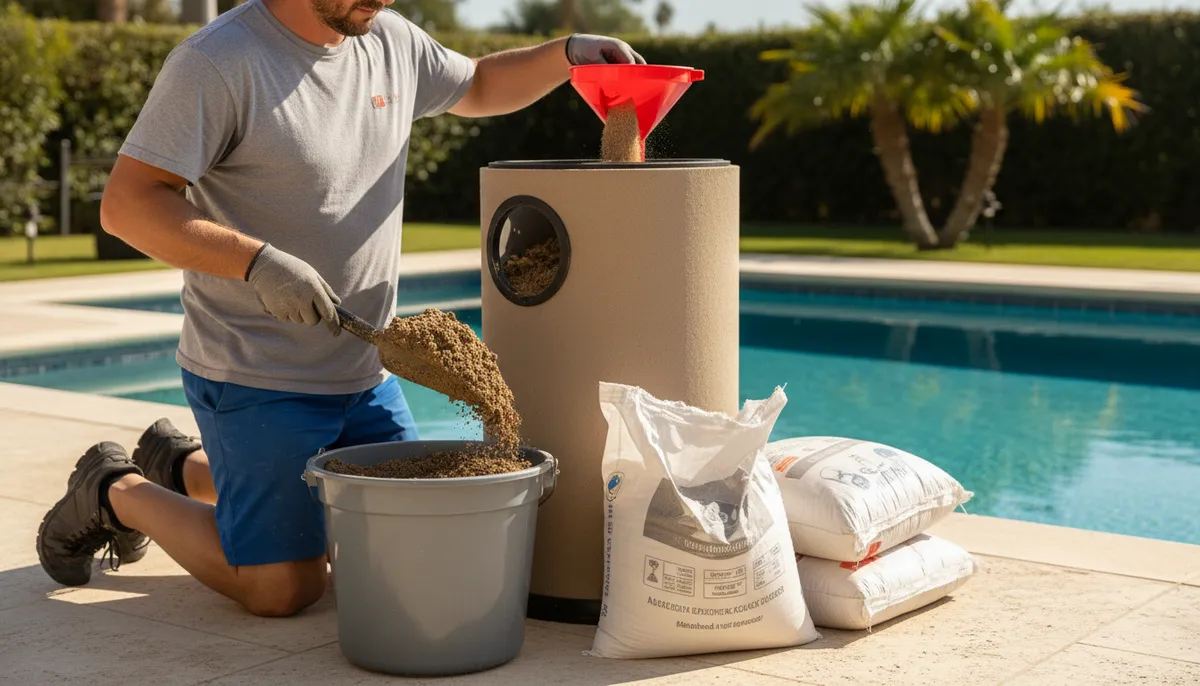
3. Replacing Worn Filter Sand
Even the best filter sand eventually loses its effectiveness. Over time, the sharp edges that trap debris get worn smooth, and the sand itself can calcify or clump together. When backwashing stops improving water clarity or you’re backwashing constantly, it’s time to replace the sand. This repair requires some muscle but saves you from buying a whole new filter. You’ll need about 50 pounds of #20 silica sand for most residential filters, though larger commercial setups need more.
Here’s how to tackle this project:
- Turn off the pump and drain water from the filter tank
- Remove the multiport valve or top mount carefully
- Scoop or vacuum out the old sand, protecting the laterals at the bottom
- Inspect laterals for cracks and replace if damaged
- Fill the tank halfway with water to cushion the laterals
- Pour in new sand slowly, avoiding direct hits on the laterals
- Reassemble the valve and backwash thoroughly before filtering
Many Tampa homeowners prefer leaving sand replacement to professionals like Panther Pools, who have the experience to handle it quickly without damaging delicate components. The job gets messy, and one mistake with the laterals can lead to sand in your pool.
4. Maintaining DE Filter Grids
Diatomaceous earth filters provide the finest filtration but require more attention than other types. The filter grids inside hold the DE powder that does the actual filtering work. Over time, these grids can become coated with oils and minerals, or they can develop tears that let DE powder escape into your pool. Regular maintenance keeps your DE filter working at peak performance and extends the life of those expensive grids.
You’ll need to backwash your DE filter every one to three months, then add fresh DE powder to recoat the grids. After backwashing, add the manufacturer’s recommended amount of DE powder through your skimmer with the pump running. The powder gets sucked through the system and settles on the grids in a thin, even layer. Most filters need one pound of DE powder for every 10 square feet of filter area. Check your owner’s manual for the exact amount, or look for the information printed on the filter tank.
Deep Cleaning DE Filter Grids
At least once a year, your DE filter grids need a thorough cleaning that goes beyond simple backwashing. Open the filter tank and carefully remove the grid assembly. Spray down each grid individually with a strong stream from your garden hose, removing all the old DE and built-up debris. For stubborn deposits, soak the grids overnight in a filter cleaning solution specifically designed for DE filters. Inspect each grid carefully for tears or holes, replacing damaged ones immediately. Reassemble everything, add fresh DE powder, and you’re back in business with maximum filtration power.
| Filter Type | Cleaning Frequency | Major Maintenance | Replacement Timeline |
|---|---|---|---|
| Cartridge | Every 2-6 weeks | Deep clean monthly | Every 2-3 years |
| Sand | Backwash every 1-4 weeks | Check pressure gauge weekly | Replace sand every 5-7 years |
| DE | Backwash every 1-3 months | Grid cleaning annually | Replace grids every 7-10 years |
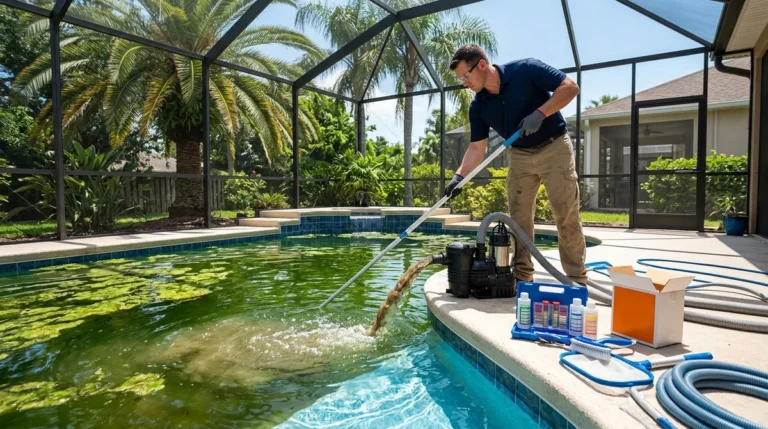
5. Fixing Pressure-Related Problems
Your filter’s pressure gauge is like a vital sign monitor for your pool’s circulation system. Normal operating pressure varies by pool and filter type but typically falls between 10 and 25 psi. When pressure climbs 8-10 psi above your baseline (or 20-25% for DE filters), your filter is telling you it needs cleaning or repair. High pressure means restricted flow through dirty filter media. Low pressure indicates problems with the pump, skimmer blockages, or air leaks in the system that need immediate attention.
If cleaning doesn’t fix high pressure readings, you might have a different issue. Check for closed or partially closed valves in your plumbing that restrict water flow. Inspect your pump basket and skimmer baskets for debris that blocks water before it reaches the filter. Sometimes the pressure gauge itself fails and needs replacement. A stuck gauge gives false readings that can lead you down the wrong repair path, so tap it gently and compare readings over several days to verify accuracy.
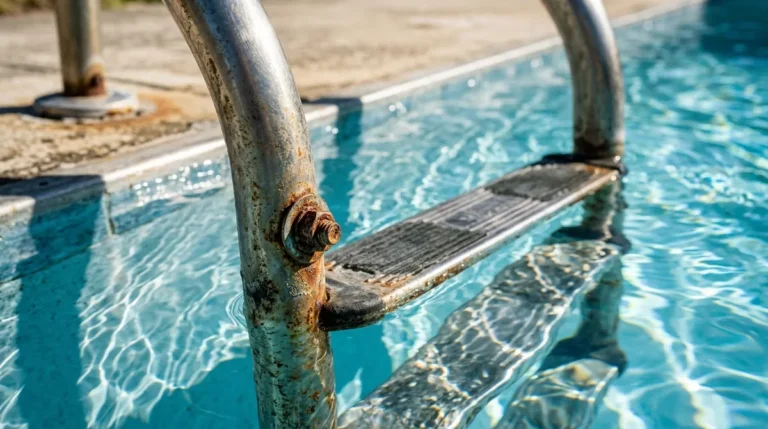
6. Repairing Filter Housing Leaks
Water leaking from your filter housing causes water loss, wastes energy, and can damage surrounding equipment or surfaces. Most leaks come from worn O-rings, loose drain plugs, or cracked housing parts. The O-ring that seals the filter tank to the top or multiport valve is a common culprit. Over time, this rubber ring dries out, cracks, or gets pinched during reassembly. Replacing the O-ring is inexpensive and straightforward: remove the top, clean the groove thoroughly, apply a thin coat of silicone lubricant to the new O-ring, and press it firmly into place.
For cracks in the filter housing itself, repairs get trickier. Small cracks in plastic housings can sometimes be patched with specialized pool equipment epoxy, but this is usually a temporary fix. Significant cracks or damage to the tank means replacement is your best option. Before you assume the worst, check all your unions, drain plugs, and pressure relief valves. Tightening a loose connection often stops the leak without any real repair needed. If you’re dealing with persistent leaks or multiple problem areas, professional pool maintenance services can diagnose the root cause and recommend the most cost-effective solution.
7. Addressing Air in the Filter System
Air bubbles flowing from your return jets signal problems that affect filter performance and pump efficiency. Air can enter your system through worn pump lid O-rings, loose plumbing connections, or cracks in suction lines buried underground. When air gets trapped in your filter, it creates an “air lock” that prevents proper water flow and filtration. You might hear gurgling sounds, see reduced water flow, or notice your pump struggling to prime properly.
Start troubleshooting at the pump. Remove the pump lid and inspect the O-ring for cracks, dryness, or debris. Clean and lubricate it, or replace if it’s damaged. Check that the pump lid tightens securely and seats properly. Next, inspect all visible plumbing connections on the suction side of your system (before the pump). Tighten any loose connections and look for obvious cracks in pipes or valves. The drain plugs on your pump and filter should be tight and have good gaskets. If air problems persist after checking these areas, you might have underground leaks that require professional detection and repair services.
When to Call Professional Help
Some filter repairs are perfect DIY projects, while others need professional expertise. Consider calling experts when you face these situations:
- Repeated problems that return shortly after your repair attempts
- Underground plumbing leaks that require excavation
- Electrical issues with pump or timer systems
- Major component failures that affect system safety
- Warranty repairs that require authorized technicians
- Complex commercial filter systems with multiple components
Working with experienced professionals like those at Panther Pools gives you peace of mind that repairs are done right the first time. They bring specialized tools, genuine replacement parts, and years of experience diagnosing tricky problems that might stump even handy pool owners.
Preventive Maintenance That Stops Repairs
The best repair is the one you never have to make. Regular preventive maintenance keeps your filter running smoothly and catches small issues before they become expensive problems. Create a simple maintenance routine based on your filter type and stick to it throughout the swimming season. Monitor your pressure gauge weekly and write down the readings to establish your filter’s normal operating range. Clean or backwash when pressure rises above that range, even if the water still looks clear.
Beyond cleaning, inspect your filter components regularly for signs of wear. Look for cracks in the housing, brittle O-rings, damaged grids or cartridges, and loose connections. Keep replacement parts on hand for common wear items like O-rings and cartridges so you’re ready when maintenance day arrives. Balance your pool chemistry carefully because poor water balance accelerates filter wear and causes scale buildup that shortens component life. The EPA Pool Resources provides excellent guidance on maintaining proper water chemistry.
Professional Service Plans
Many Tampa pool owners find that professional service plans offer the best value for maintaining their filters and entire pool systems. Regular visits from trained technicians catch problems early, ensure proper chemical balance, and keep equipment running efficiently. Service plans typically include filter cleaning, equipment inspections, and chemical adjustments that prevent the majority of repair needs. The Independent Pool and Spa Service Association sets industry standards for professional pool maintenance that protect your investment.
Professional maintenance also provides accountability and expertise that takes the guesswork out of pool care. Instead of wondering if you’re cleaning your filter often enough or correctly, you have experienced technicians handling these tasks on a proven schedule. They spot potential failures before they happen and can often repair issues during routine visits before you even notice a problem. For busy families, retirees, and commercial property managers, this hands-off approach to filter maintenance is worth every penny.
Keep Your Pool Filter Running Strong
Your pool filter is the hardest working piece of equipment in your backyard, quietly processing thousands of gallons of water every day. Understanding these seven common repairs empowers you to maintain your filter properly and recognize when professional help makes sense. Regular cleaning based on pressure gauge readings, timely replacement of worn components, and attention to small problems before they grow keeps your filter performing at its best for years to come.
Whether you’re a hands-on pool owner who enjoys weekend maintenance or someone who prefers professional service, the key is consistency. Your filter needs regular attention regardless of who provides it. Clean water depends on a healthy filter, and a healthy filter depends on proactive care. Tampa’s warm climate and long swimming season put extra demands on pool equipment, making maintenance even more critical here than in cooler regions.
Ready to ensure your pool filter gets the expert care it deserves? The certified professionals at Panther Pools bring years of experience maintaining and repairing all types of pool filters throughout Tampa. With seven-day-a-week customer support and a commitment to quality service, they keep your pool crystal clear all year long. Schedule your free estimate today and discover why Tampa families trust Panther Pools for reliable, professional pool care that takes the worry out of pool ownership.
FAQs
Q: How do I know when my pool filter needs repair?
A: Your filter needs attention when the pressure gauge reads 8-10 psi above normal operating pressure, when you notice reduced water flow from return jets, or when your pool water stays cloudy despite balanced chemicals. Strange noises, visible leaks, or air bubbles from return jets also signal repair needs. Regular pressure monitoring helps you catch problems early before they become expensive.
Q: Can I repair my pool filter myself or should I hire a professional?
A: Simple repairs like cleaning cartridges, backwashing sand filters, or replacing O-rings are perfect DIY projects for most pool owners. However, issues like underground leaks, electrical problems, repeated failures, or major component replacements benefit from professional expertise. When in doubt, a quick consultation with experienced technicians can save you time and prevent costly mistakes.
Q: How often should I clean my pool filter?
A: Cleaning frequency depends on your filter type and pool usage. Cartridge filters need rinsing every 2-6 weeks with deep cleaning monthly. Sand filters require backwashing every 1-4 weeks when pressure rises above normal. DE filters should be backwashed every 1-3 months with fresh powder added after each cycle. Always monitor your pressure gauge rather than following a rigid schedule since pool conditions vary.
Q: What causes low pressure in my pool filter system?
A: Low pressure usually indicates problems before the filter rather than in the filter itself. Check for clogged skimmer baskets, blocked pump baskets, or air leaks in suction lines. Partially closed valves or damaged impellers in your pump can also cause low pressure readings. If cleaning baskets and checking valves doesn’t fix the problem, you might have underground suction line leaks that need professional detection.
Q: When should I replace my pool filter instead of repairing it?
A: Replace your filter when repair costs approach 50-60% of replacement cost, when the housing develops major cracks that can’t be fixed, or when multiple components fail simultaneously. Filters older than 15 years often make more sense to replace even if they’re still functioning. Upgraded filter technology might also justify replacement if you want better efficiency or easier maintenance for your pool.