
Key Takeaways
-
Proper pool cover installation reduces water evaporation, chemical costs, and maintenance workload while keeping your family safer—a critical investment for Tampa’s year-round pool exposure.
-
Anchor placement must be 18 inches from the cover edge (not pool edge) at 1.625-2.25 inches deep with brass anchors protruding 3/8 inch above deck for secure spring attachment.
-
Achieve 50% spring compression tension across all anchor points by walking the perimeter and adjusting each spring individually to prevent sagging, shifting, and premature wear.
-
Clean your pool deck thoroughly and raise water to tile line before installation, then measure your pool at widest points and plan 10-15 inches of overlap on each side.
-
Mesh safety covers are ideal for Tampa’s frequent rain because they drain water while blocking debris, eliminating the need for a pump—unlike solid covers requiring water removal.
-
Professional installation is strongly recommended for automatic pool covers due to complex track and motorized roller systems; DIY is suitable for solar, mesh, and standard safety covers on straight-edged pools.
Picture this: you walk out to your backyard, ready to take a refreshing dip, and your pool is sparkling clean. No leaves. No debris. No nasty algae bloom. Sound like a dream? A properly installed pool cover can make that dream a reality. Whether you’re a busy parent juggling school schedules, a retired adult who just wants to relax, or a first-time pool owner figuring things out, pool cover installation is one of the smartest moves you can make for your Tampa pool.
A good pool cover doesn’t just keep your water clean — it reduces your maintenance workload, cuts down on chemical costs, and even keeps your family safer. In this guide, we’re walking you through nine essential tips to get your pool cover installed the right way. Let’s dive in!
Why Pool Cover Installation Matters for Tampa Pool Owners
Tampa’s warm climate means your pool gets a lot of use — but it also means year-round exposure to rain, wind, pollen, and debris. A well-installed pool cover acts as your pool’s first line of defense. According to the EPA Pool Resources, pool covers can significantly reduce water evaporation, helping you conserve water and lower maintenance costs. That’s a big win for Tampa homeowners.
Beyond cleanliness, the right cover installation keeps chemicals balanced longer. That means fewer trips to the pool store and more time enjoying your backyard oasis. If you’re looking for professional help, our Pool Cleaning Services Tampa team is always ready to assist.
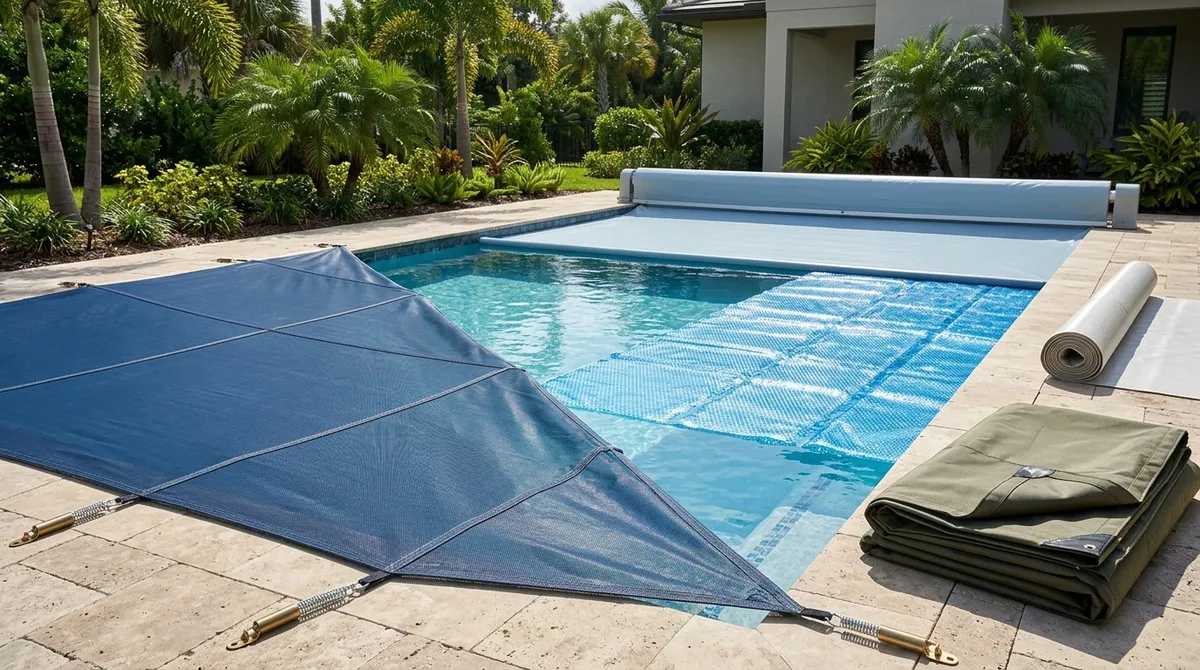
The Main Types of Pool Covers to Know
Before we get into installation tips, it helps to know what you’re working with. Different cover types have different installation requirements. Here’s a quick breakdown:
| Cover Type | Best For | Installation Complexity | Key Benefit |
|---|---|---|---|
| Safety Cover (Solid) | Families with kids/pets | Moderate | Maximum protection and safety |
| Mesh Safety Cover | Debris-prone areas | Moderate | Drains water, blocks debris |
| Solar Cover | Heat retention | Easy | Reduces evaporation and heating costs |
| Automatic Cover | Convenience-focused owners | High (professional recommended) | One-touch operation |
Knowing your cover type sets the foundation for a smooth installation. Now let’s get into the good stuff!
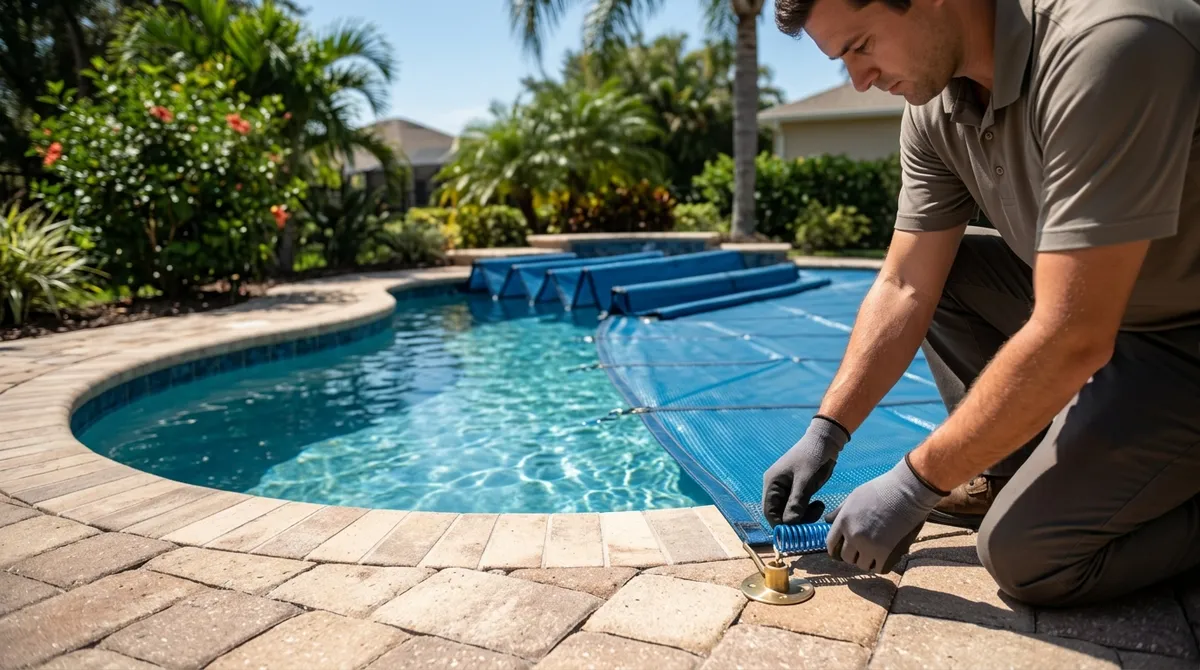
9 Pool Cover Installation Tips Every Tampa Owner Needs
1. Start With a Clean Deck and Pool
Before you do anything else, clean your pool deck thoroughly. Remove any dirt, leaves, or standing water from the surface. A clean starting point makes the entire pool cover installation process easier and more accurate. It also prevents debris from getting trapped under your cover, which can scratch your pool or cause staining.
Make sure your pool water is also at the right level — raised to the tile line. This prevents the cover from sagging inward and collecting rainwater in the center.
2. Remove Ladders and Handrails First
This tip seems simple, but it’s often overlooked. Always remove pool ladders, handrails, and any other accessories before placing your cover. These obstacles make it nearly impossible to lay the cover flat and can damage the material during installation. Store them safely nearby so you can reinstall them quickly once the cover is secured.
3. Measure Twice, Install Once
Accurate measurements are everything in pool cover installation. Your cover should overlap the pool edge by 10 to 15 inches on each side. This overlap ensures the cover stays in place and provides adequate safety coverage. Use water-filled bags or buckets around the perimeter to hold the cover in position while you work — this prevents it from sliding as you move around.
- Measure pool length and width at their widest points
- Add 10–15 inches on each side for proper overlap
- Use water bags temporarily to hold edges while positioning
- Double-check measurements before drilling any anchors
4. Drill Anchors in the Right Spot
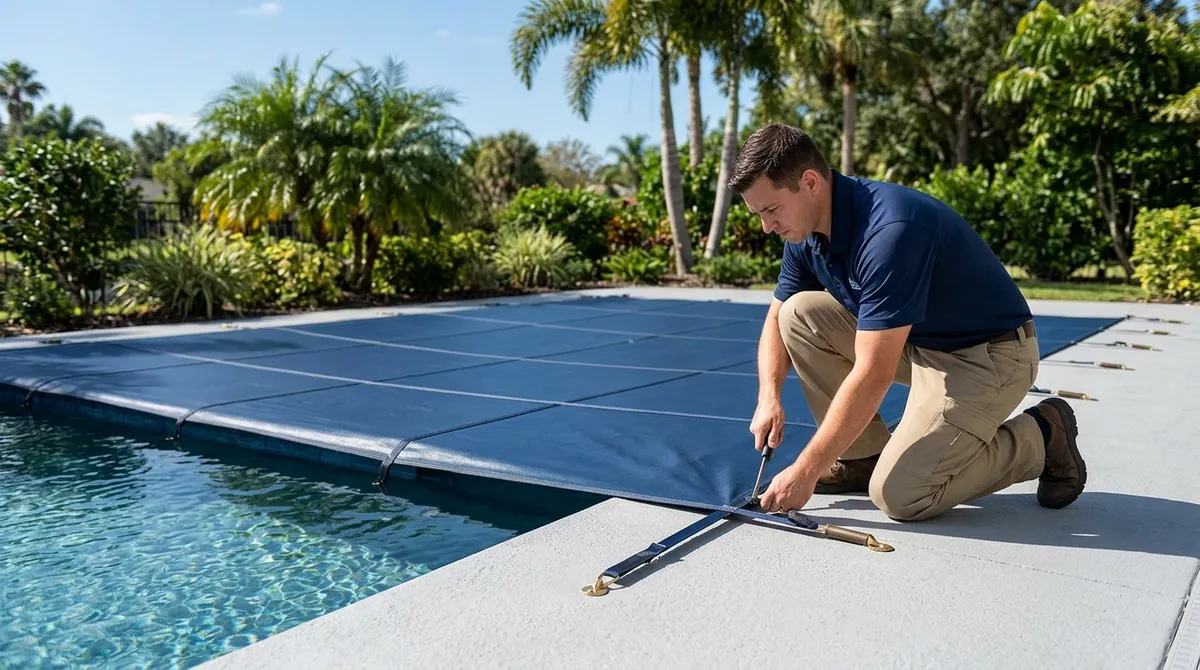
For safety pool covers on concrete decks, proper anchor placement is critical. Anchors should be positioned 18 inches from the cover edge — not the pool edge. This is a detail that many DIYers miss. Use a rotary hammer with a 3/4 to 1-inch masonry bit and drill to a depth of 1.625 to 2.25 inches into the concrete deck.
Insert brass anchors flush with the deck surface, then screw in your inserts, leaving about 3/8 of an inch protruding above the deck. This protrusion is what your springs and straps will attach to. Need guidance on pool deck care? Check out our Pool Maintenance in West Chase page for more tips.
5. Align Anchors With Each Strap
Each anchor point must line up directly with a strap on your pool cover. Misaligned anchors create uneven tension, which causes the cover to sag, shift, or wear out prematurely. Take your time during this step. Lay the cover out and mark where each strap meets the deck before drilling a single hole.
Here’s a simple checklist to stay on track:
- Lay the cover over the pool with even overlap on all sides
- Mark each strap endpoint on the deck with chalk or tape
- Drill anchor holes at each marked point
- Insert anchors and attach springs to each strap
- Adjust until tension is even across all points
6. Achieve the Right Spring Tension
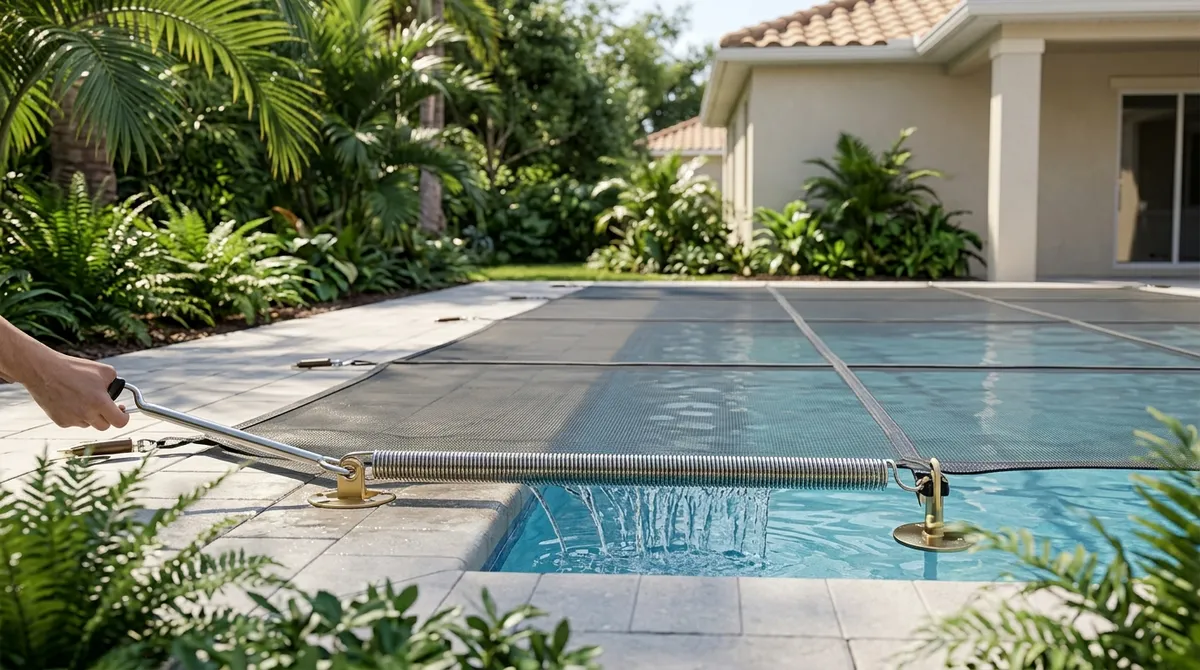
Once your springs are attached, tension is everything. The golden rule? Aim for 50% spring compression. This means each spring should be stretched to about half its maximum length. Too loose and the cover sags, collecting debris and water. Too tight and you risk damaging the cover material or pulling anchors out of the deck.
Walk around the entire pool and check each spring individually. Adjust as needed until the tension feels even on all sides. A taut, evenly tensioned cover is a sign of a great pool cover installation job well done!
7. Install Mesh Covers for Easy Water Drainage
Mesh safety covers are especially popular in Tampa due to our frequent rain showers. Unlike solid covers, mesh covers allow rainwater to drain through while blocking leaves and debris. The Florida Swimming Pool Association (FSPA) recommends mesh covers for areas with high rainfall because they prevent dangerous water accumulation on top of the cover.
Installation is similar to solid safety covers — secure anchors, attach straps, and ensure even tension. The key difference is you don’t need to worry about a pump to remove standing water on top. That’s one less thing on your maintenance list!
8. Set Up Solar Covers the Simple Way
Solar covers are the easiest pool cover installation option out there. No drilling, no anchors, no springs. Here’s all you do:
- Measure your pool’s dimensions carefully
- Trim the solar cover to match your pool shape if needed
- Float the cover bubble-side DOWN on the water surface
- Roll it up on a reel when not in use for easy removal
The bubble side faces down because those bubbles trap heat from the sun and transfer it into the water. Solar covers also dramatically reduce evaporation, which is a huge benefit in Tampa’s hot and sunny climate. They make your pool easier to maintain by reducing chemical loss and keeping the water cleaner between service visits. Speaking of which, our Westchase Pool Service team loves seeing pools protected with solar covers!
9. Let Professionals Handle Automatic Covers
Automatic pool covers are amazing — one button and your pool is covered or uncovered. But installation is a whole different level of complexity. It involves installing tracks along both sides of the pool, mounting a motorized roller system, and connecting the cover to the mechanism precisely. The Independent Pool and Spa Service Association (IPSSA) strongly recommends professional installation for automatic systems to ensure safety and warranty compliance.
If you’re considering an automatic cover, reach out to a trusted pool professional. It’s one of those situations where the investment in professional installation pays for itself in reliability and safety.
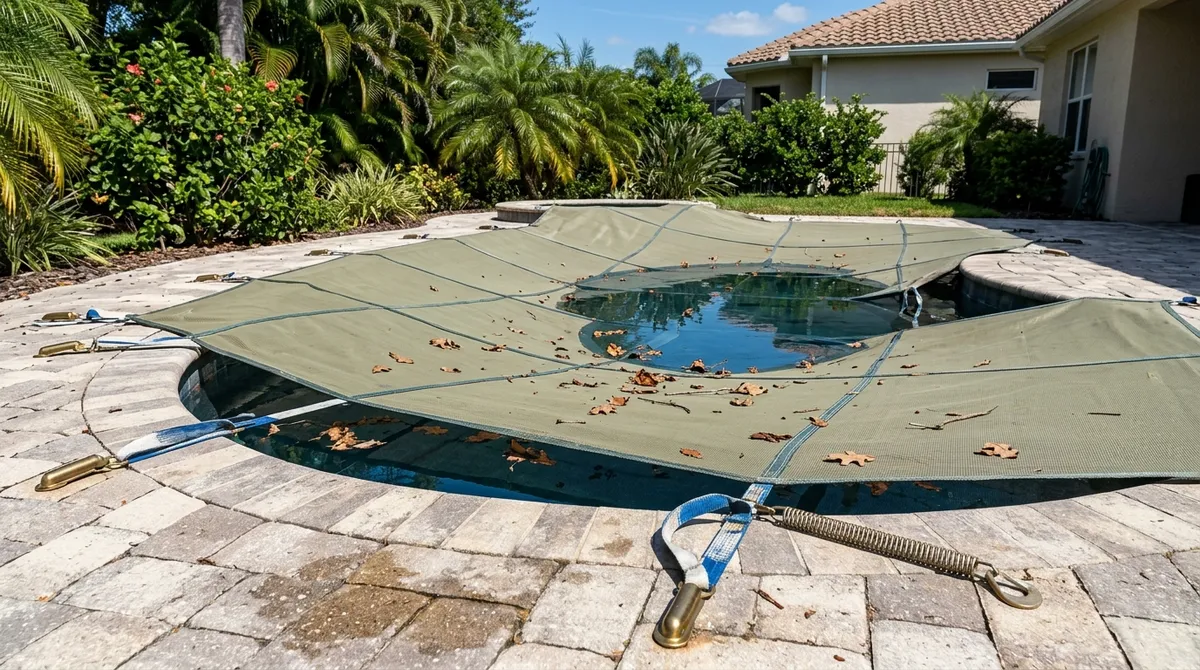
Common Pool Cover Installation Mistakes to Avoid
Even the most enthusiastic DIYer can run into trouble. Here are the most common mistakes to watch out for:
- Skipping deck cleaning: Debris under the cover scratches the pool and causes staining
- Wrong anchor depth: Too shallow means anchors pull out; too deep weakens the concrete
- Uneven spring tension: Creates sagging that collects water and debris
- Leaving ladders in place: Causes tearing and prevents proper fit
- Ignoring water level: Low water causes the cover to sag and collect rainwater
- Buying the wrong size: Always measure your pool before purchasing a cover
How Pool Covers Reduce Your Cleaning Needs
Here’s the beautiful connection between pool cover installation and pool cleaning — a good cover means less work for everyone. When your pool is properly covered, leaves, insects, pollen, and dirt stay out. Your water chemistry stays balanced longer. Algae has fewer nutrients to grow on. Evaporation is reduced, which means less water and chemical top-offs.
For busy families, working professionals, and retirees who just want to enjoy their pool without constant upkeep, a quality cover is a game-changer. And when you pair a great cover with professional pool cleaning services, your pool practically takes care of itself. Our team at Panther Pools knows firsthand how much easier regular maintenance becomes when our customers use proper pool covers.
Quick Reference: Pool Cover Installation Steps at a Glance
- Clean the pool deck and raise water to tile level
- Remove all ladders, handrails, and accessories
- Measure pool dimensions and plan 10–15 inch overlap
- Position the cover using water bags to hold it in place
- Mark anchor locations aligned with each strap
- Drill concrete anchors 18 inches from cover edge at 1.625–2.25 inch depth
- Insert brass anchors flush, with 3/8 inch protrusion above deck
- Attach springs and adjust to 50% compression for proper tension
- Test the full installation by walking the perimeter and checking tension
When to Call a Professional for Pool Cover Help
Sometimes DIY is the way to go. Other times, it makes total sense to call in the pros. Here’s a simple guide to help you decide:
- DIY-friendly: Solar covers, standard mesh and solid safety covers on straight-edged pools
- Call a pro: Automatic covers, irregularly shaped pools, damaged anchors, or if you’re unsure about concrete drilling
- Always call a pro: Commercial pools, pools with complex deck configurations, or warranty-required installations
If you’re ever unsure, it’s always better to ask. Our knowledgeable team is happy to walk you through your options and recommend the best approach for your specific pool setup.
Wrapping It All Up
Pool cover installation doesn’t have to be intimidating. With the right preparation, the correct tools, and a little patience, you can protect your Tampa pool and dramatically reduce your cleaning and maintenance burden. Whether you choose a simple solar cover or a full safety cover system, the investment pays off every single week in cleaner water and fewer headaches.
And remember — a great pool cover works best when paired with regular professional pool maintenance. At Panther Pools, we’re proud to serve Tampa homeowners with reliable, expert pool care seven days a week. We’ve helped hundreds of pool owners keep their water crystal clear, and we’d love to do the same for you. Get in touch with our friendly team today and let’s talk about how we can make your pool ownership experience as enjoyable as possible!
FAQs
Q: How do I install a safety pool cover on a concrete deck?
A: Installing a safety pool cover on concrete involves cleaning the deck, positioning the cover with 10–15 inches of overlap on each side, and drilling anchor holes 18 inches from the cover edge at a depth of 1.625 to 2.25 inches. Insert brass anchors flush with the deck, attach your springs and straps, and adjust tension to 50% spring compression for a secure, even fit. It’s totally doable as a DIY project — just take your time with the anchor placement!
Q: Can I install a pool cover myself or should I hire a professional?
A: Solar covers and standard mesh or solid safety covers are great DIY projects for most pool owners! However, automatic pool cover systems involve motorized tracks and rollers that really benefit from professional installation to ensure everything works safely and correctly. When in doubt, a quick call to your pool service team can point you in the right direction.
Q: What is the difference between a mesh and a solid safety pool cover?
A: Mesh safety covers allow rainwater to drain through while blocking leaves and debris, making them ideal for rainy climates like Tampa. Solid safety covers offer a tighter seal against contaminants but require a pump to remove standing water that accumulates on top. Both are excellent options depending on your priorities — mesh is lower maintenance, while solid covers offer maximum debris protection.
Q: How does a pool cover help reduce cleaning time?
A: A properly installed pool cover keeps leaves, insects, dirt, and pollen out of your water, which means less debris to skim and vacuum. It also slows down chemical evaporation and helps maintain water balance longer, so you’re spending less time (and money) on chemical adjustments. It’s one of the easiest ways to keep your pool looking great between professional cleanings!
Q: How often should I remove and reinstall my pool cover for cleaning?
A: For most Tampa pools, removing your cover during regular swim season and reinstalling it when the pool is not in use is the best approach. If you use a professional pool cleaning service, your technician will typically handle removing and replacing the cover as part of their visit. Keeping your cover clean and properly stored when not in use also extends its life significantly!